


This classic Russian apple cake is a staple from simpler times. Follow our easy recipe below to make this sweet, delicious, and nutritious apple cinnamon cake - you likely already have all the ingredients!
A French chef invented this tasty apple-based cake in England for her employer, a Russian Czar. While this dish is an international invention, Soviet-era Russians adjusted the ingredients and brought it into the mainstream.
Sharlotka has just a few inexpensive ingredients that you may already have on hand and makes a fantastic way to use up any extra apples you have kicking around your countertops. This cake has just the right amount of sweetness, and we added extra richness to the batter with the sour cream.
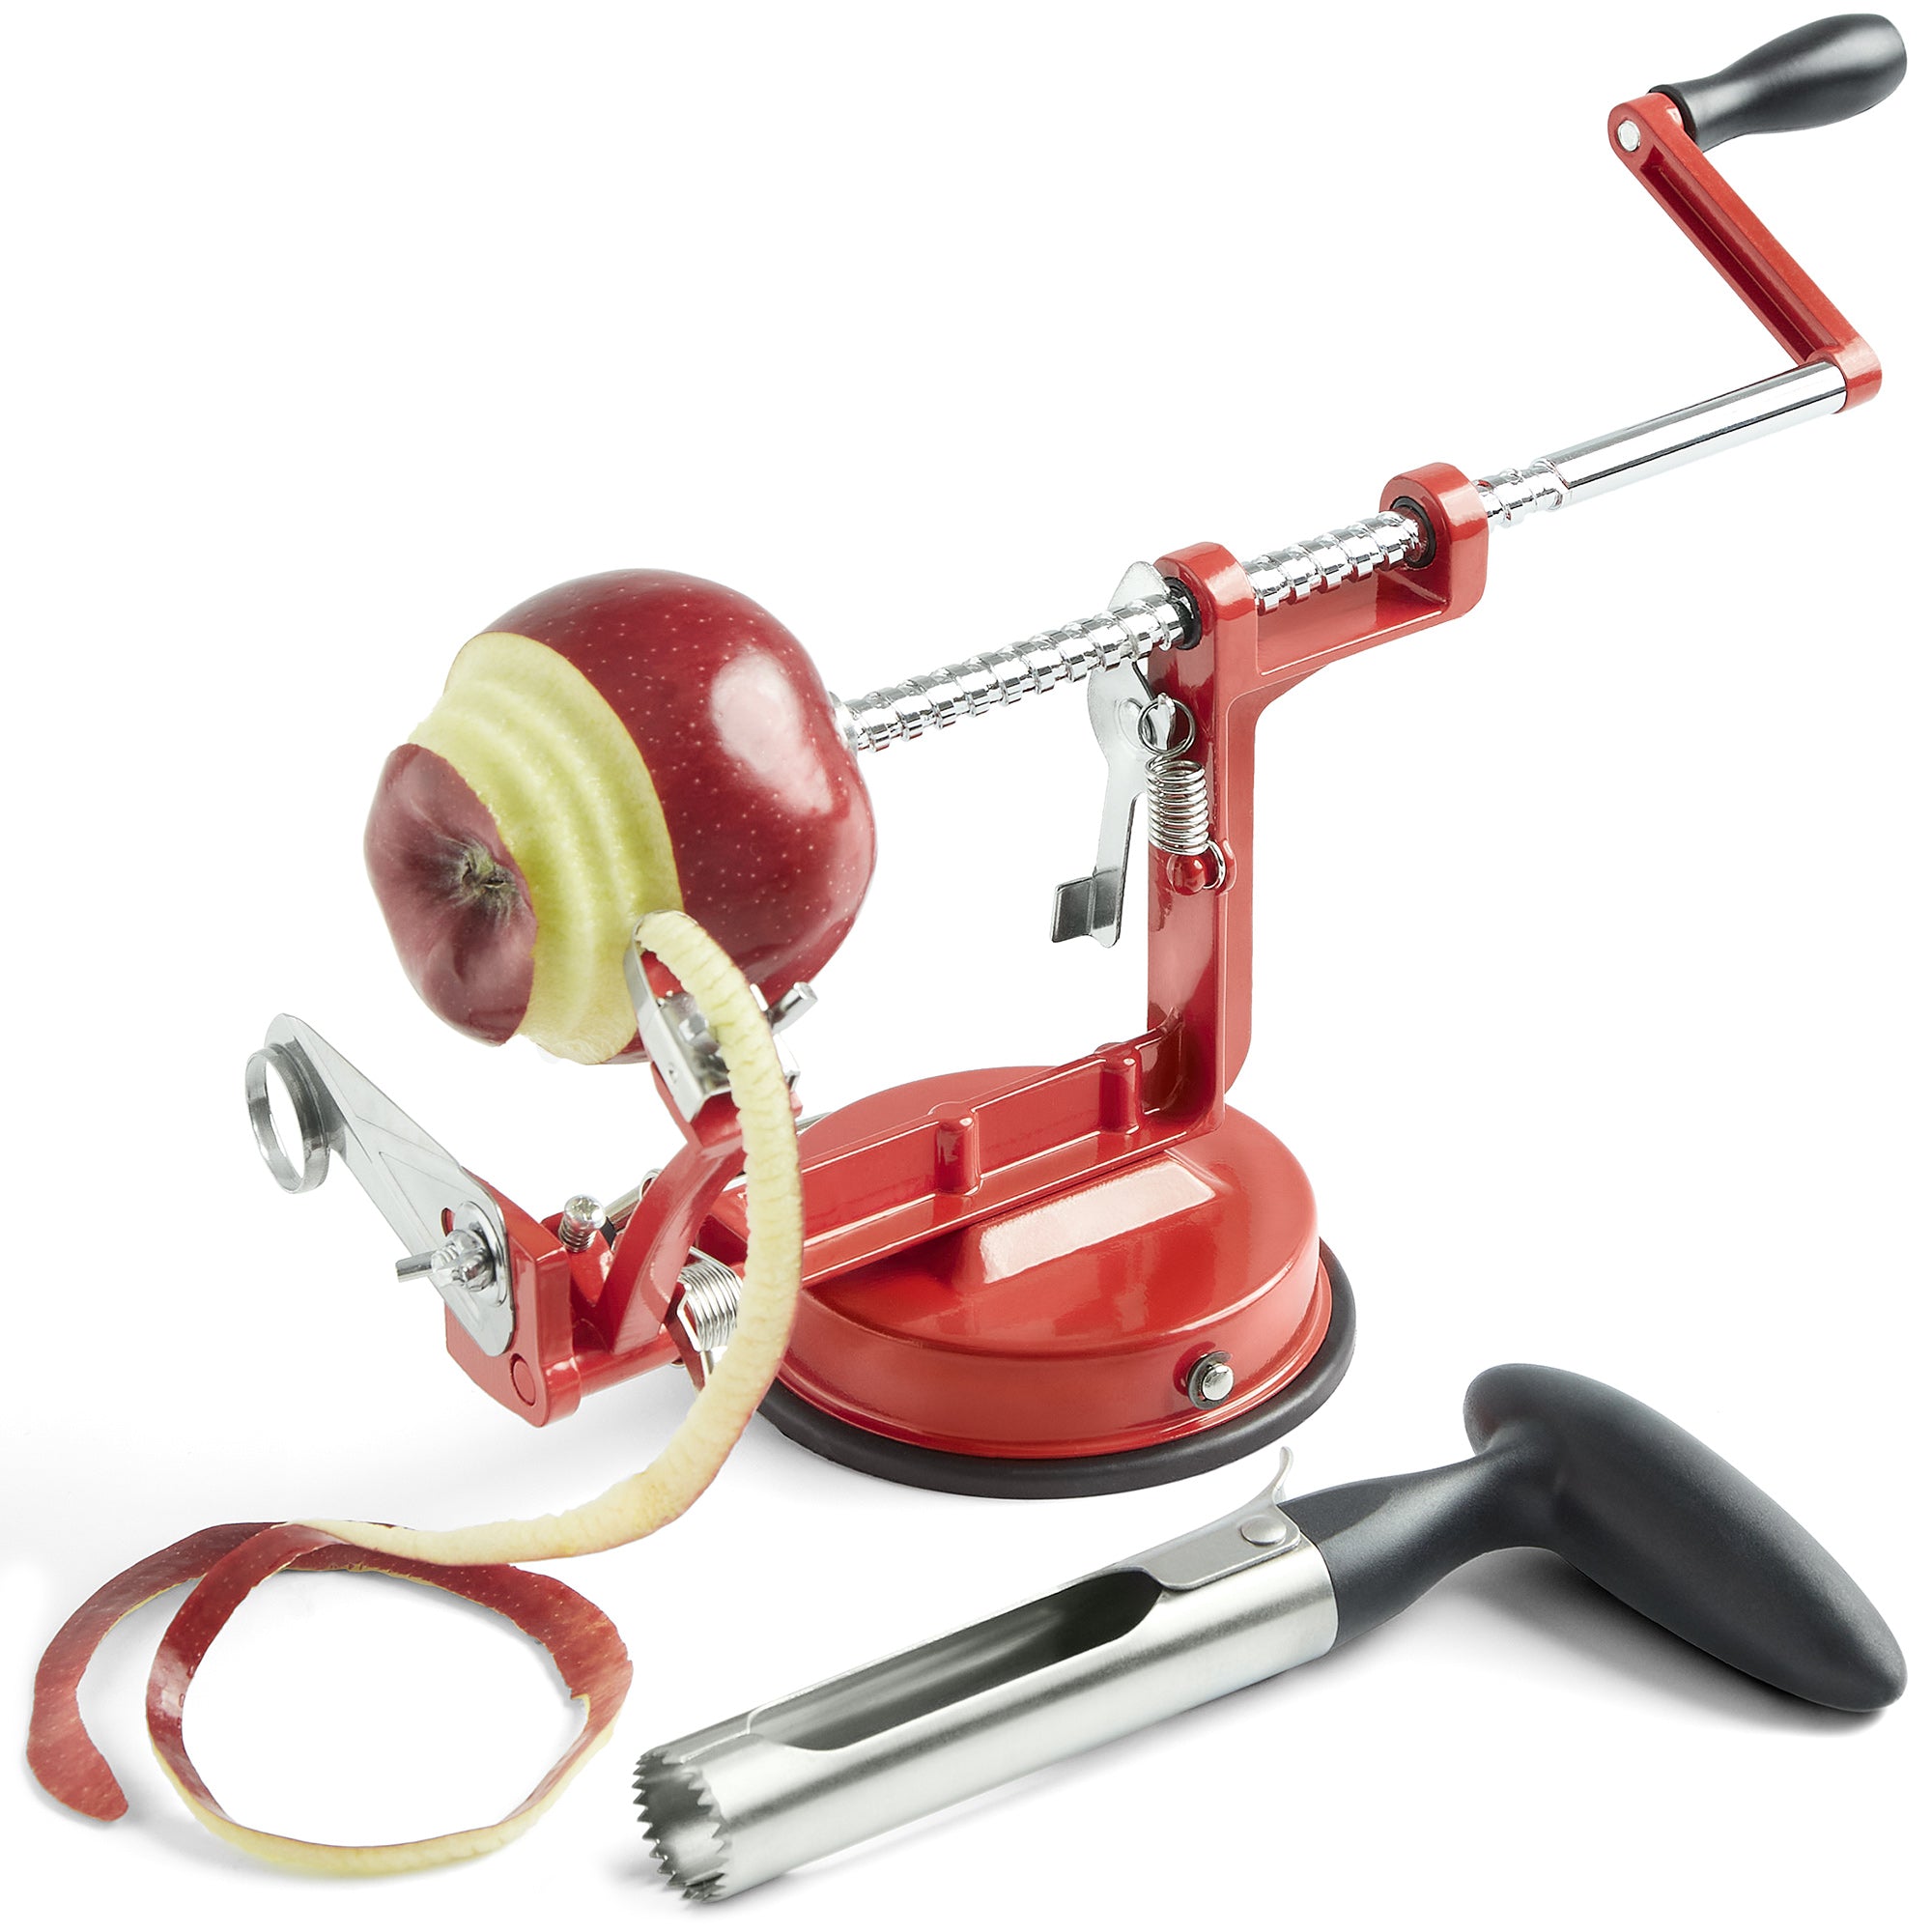
We prefer tart Granny Smiths in this recipe, but you can use just about any apple you want. Generally, the more firm the texture, the better the apples hold up to baking. Peel your apples with an apple peeler or leave them unpeeled - both ways look and taste fantastic.
Follow our instructions below to have this delicious sharlotka cake prepped and ready to bake in just 20 minutes!
How to make sharlotka
Prep Time: 20 mins
Cooking Time: 50 mins
Total Time: 1 hr, 10 mins
Ingredients
- 1/2 Tbsp butter
- 3 apples (about 1 1/3 lb)
- 1 lemon, freshly juiced
- 1 tsp ground cinnamon
- 1 1/4 c. all-purpose white flour
- 1 1/2 tsp baking powder
- 4 eggs, at room temperature
- pinch of sea salt
- 1 c. white sugar
- 1/4 c. sour cream
- 1 tsp pure vanilla extract
Directions
- Cover the bottom of your 9-inch springform pan or 8 x 8-inch square baking dish with parchment paper. Melt the ½ Tbsp of butter in a mug in the microwave, then use the melted butter to brush the inside of the springform generously.
- Core 2 of your apples and dice them into small, bite-sized pieces. Leave the third apple out for now. You can peel your apple or leave it unpeeled if you prefer.
- Place your apple chunks into a small-sized mixing bowl, then sprinkle them with fresh lemon juice and cinnamon. Stir to evenly cover the apples, and set the bowl aside.
- In a medium-sized mixing bowl, mix the all-purpose flour and baking powder. Stir to combine and set aside.
- Preheat your oven to 350°F.
- In a large-sized mixing bowl, toss in your eggs and a pinch of salt. Use a good-quality electric hand mixer to beat the eggs until the yolks and whites combine.
- Add ¼ c. of sugar, then increase the mixer speed.
- Slowly add the rest of the sugar until the eggs and sugar mixture is well incorporated.
- Beat the eggs for about 6 mins, or until the combination is thick and pale yellow. It should fall in ribbons off the end of a rubber spatula.
- Add your sour cream and pure vanilla extract to the egg bowl. Mix again with the hand mixer, stopping when just combined. Put the hand mixer aside.
- Slowly sift the flour into the egg mixture in batches, folding it gently into the bowl with a spatula. You want the batter to be smooth, with no flour pockets remaining.
- Avoid over mixing it at this stage.
- Pour ~ ⅓ of the charlotte pie batter into the baking form or pan.
- Spread the sharlotka batter evenly with a rubber spatula.
- Add an even layer of ½ the chopped apples, slightly pressing them into the batter.
- Cover the apple layer with more batter, spreading as needed.
- Add the remaining apples, then cover them with the rest of the cake batter.
- Slightly shake the pan to help remove any air bubbles.
- Take the last remaining apple and core it. Slice it into quarters, then skinny wedges that you can arrange in a zig-zag pattern on top of the cake.
- Place the sharlotka cake on the middle rack in the oven. Bake for 50 - 60 mins, or until a toothpick inserted into the center of the cake comes out clean.
- Once cooked, take the apple sharlotka out of the oven and set it to cool on a wire cooling rack.
- Remove the cake from the baking form or pan.
- Serve and enjoy your Russian apple cake!
Apple sharlotka recipe - FAQ
What is a sharlotka?
The apple charlotte history dates back a few hundred years to 19th century London. Though sharlotka is Russian, it's more accurately a Russian/English/French invention. The root of the name comes from the English "Charlyt," a dessert made with a base of eggs, sugar, and milk.
The French chef Marie-Antoine Careme made the dessert for Russian Czar Alexander I, inventing the cake in London during the 1800s. At first, it was a Charlotte a la Parisienne, then Charlotte Russe.
Historians believe the original recipe was much richer and more decadent. However, low-earning Soviet-era Russians pared down the recipe to a few simple basics to further stretch their money.
Today, most apple sharlotka recipes contain just eggs, sugar, flour, vanilla, cinnamon, and apples.
Do I have to layer the apples in the cake?
Nope! The only reason to layer the apples is to make the cake look pretty, so if you don't feel like layering, skip it! Instead, toss your apples directly into your prepared cake batter, mix, and pour into your cake pan.
The cake's overall look will be slightly darker if you take this route, as the cinnamon adds a deep tone.
Can you freeze apple sponge cake?
This Russian apple cake freezes beautifully! First, let your cake completely cool before you freeze. Once cooled, wrap the cake in two layers of plastic wrap, followed by a layer of aluminum foil or a zippered freezer bag.
You can keep your apple cake in the freezer for up to 12 months with this method. When you're ready to enjoy, take the apple cake from the freezer and set it on the counter to thaw at room temperature before serving.
What dish can I use for this recipe?
The best dish to use is a 9-inch springform pan because it's the easiest! If you don't own one, try an 8-inch round baking dish or an 8 x 8-inch square cake pan.
How can I serve sharlotka?
Sharlotka is delicious when served at room temperature or chilled! Eat a slice all on its own, or serve it topped with a scoop of vanilla ice cream or sweet whipped cream.
Do the eggs need to be at room temperature?
While it might seem like a minor difference, the temperature of your eggs matters more than you may think. You need to beat the eggs for a long time to make sharlotka, and cold eggs are denser, making them harder to beat.
Cold eggs also affect your baking time. If you only have cold eggs on hand, break them into a bowl 15 mins before you plan to use them so they can warm to room temperature.
Do I need an electric mixer?
Youcan make this recipe by hand with a whisk, but it will require a ton of effort and won't be quite as good. Using an electric mixer helps you incorporate more air into the eggs, so your sharlotka cake turns out beautifully fluffy.
You can use a handheld mixer or a stand mixer - either will do just fine!
While using your electric mixer, take care not to overmix the batter once you add the flour - over-mixing can make the cake a little too dense, chewy, and tough.
Final notes: Russian apple charlotte
For your next get-together, swap out your typical dessert and try this sweet apple sharlotka instead.
Bon appetit! Or, as the Russians would say, "priyatnogo appetita!"